Make Your Own Training Guide: Handle Height Bells!
John Thornell
Recently, this device was featured in row2k’s Rowing Hack: Handle Height Bells. Here’s a bit more info on this home-made, hand-height guide and instructions on how to make your own.
First, the guide can help rowers in two ways:
Keep level hand heights on the recovery
Practice raising hands into the catch
Level hand height
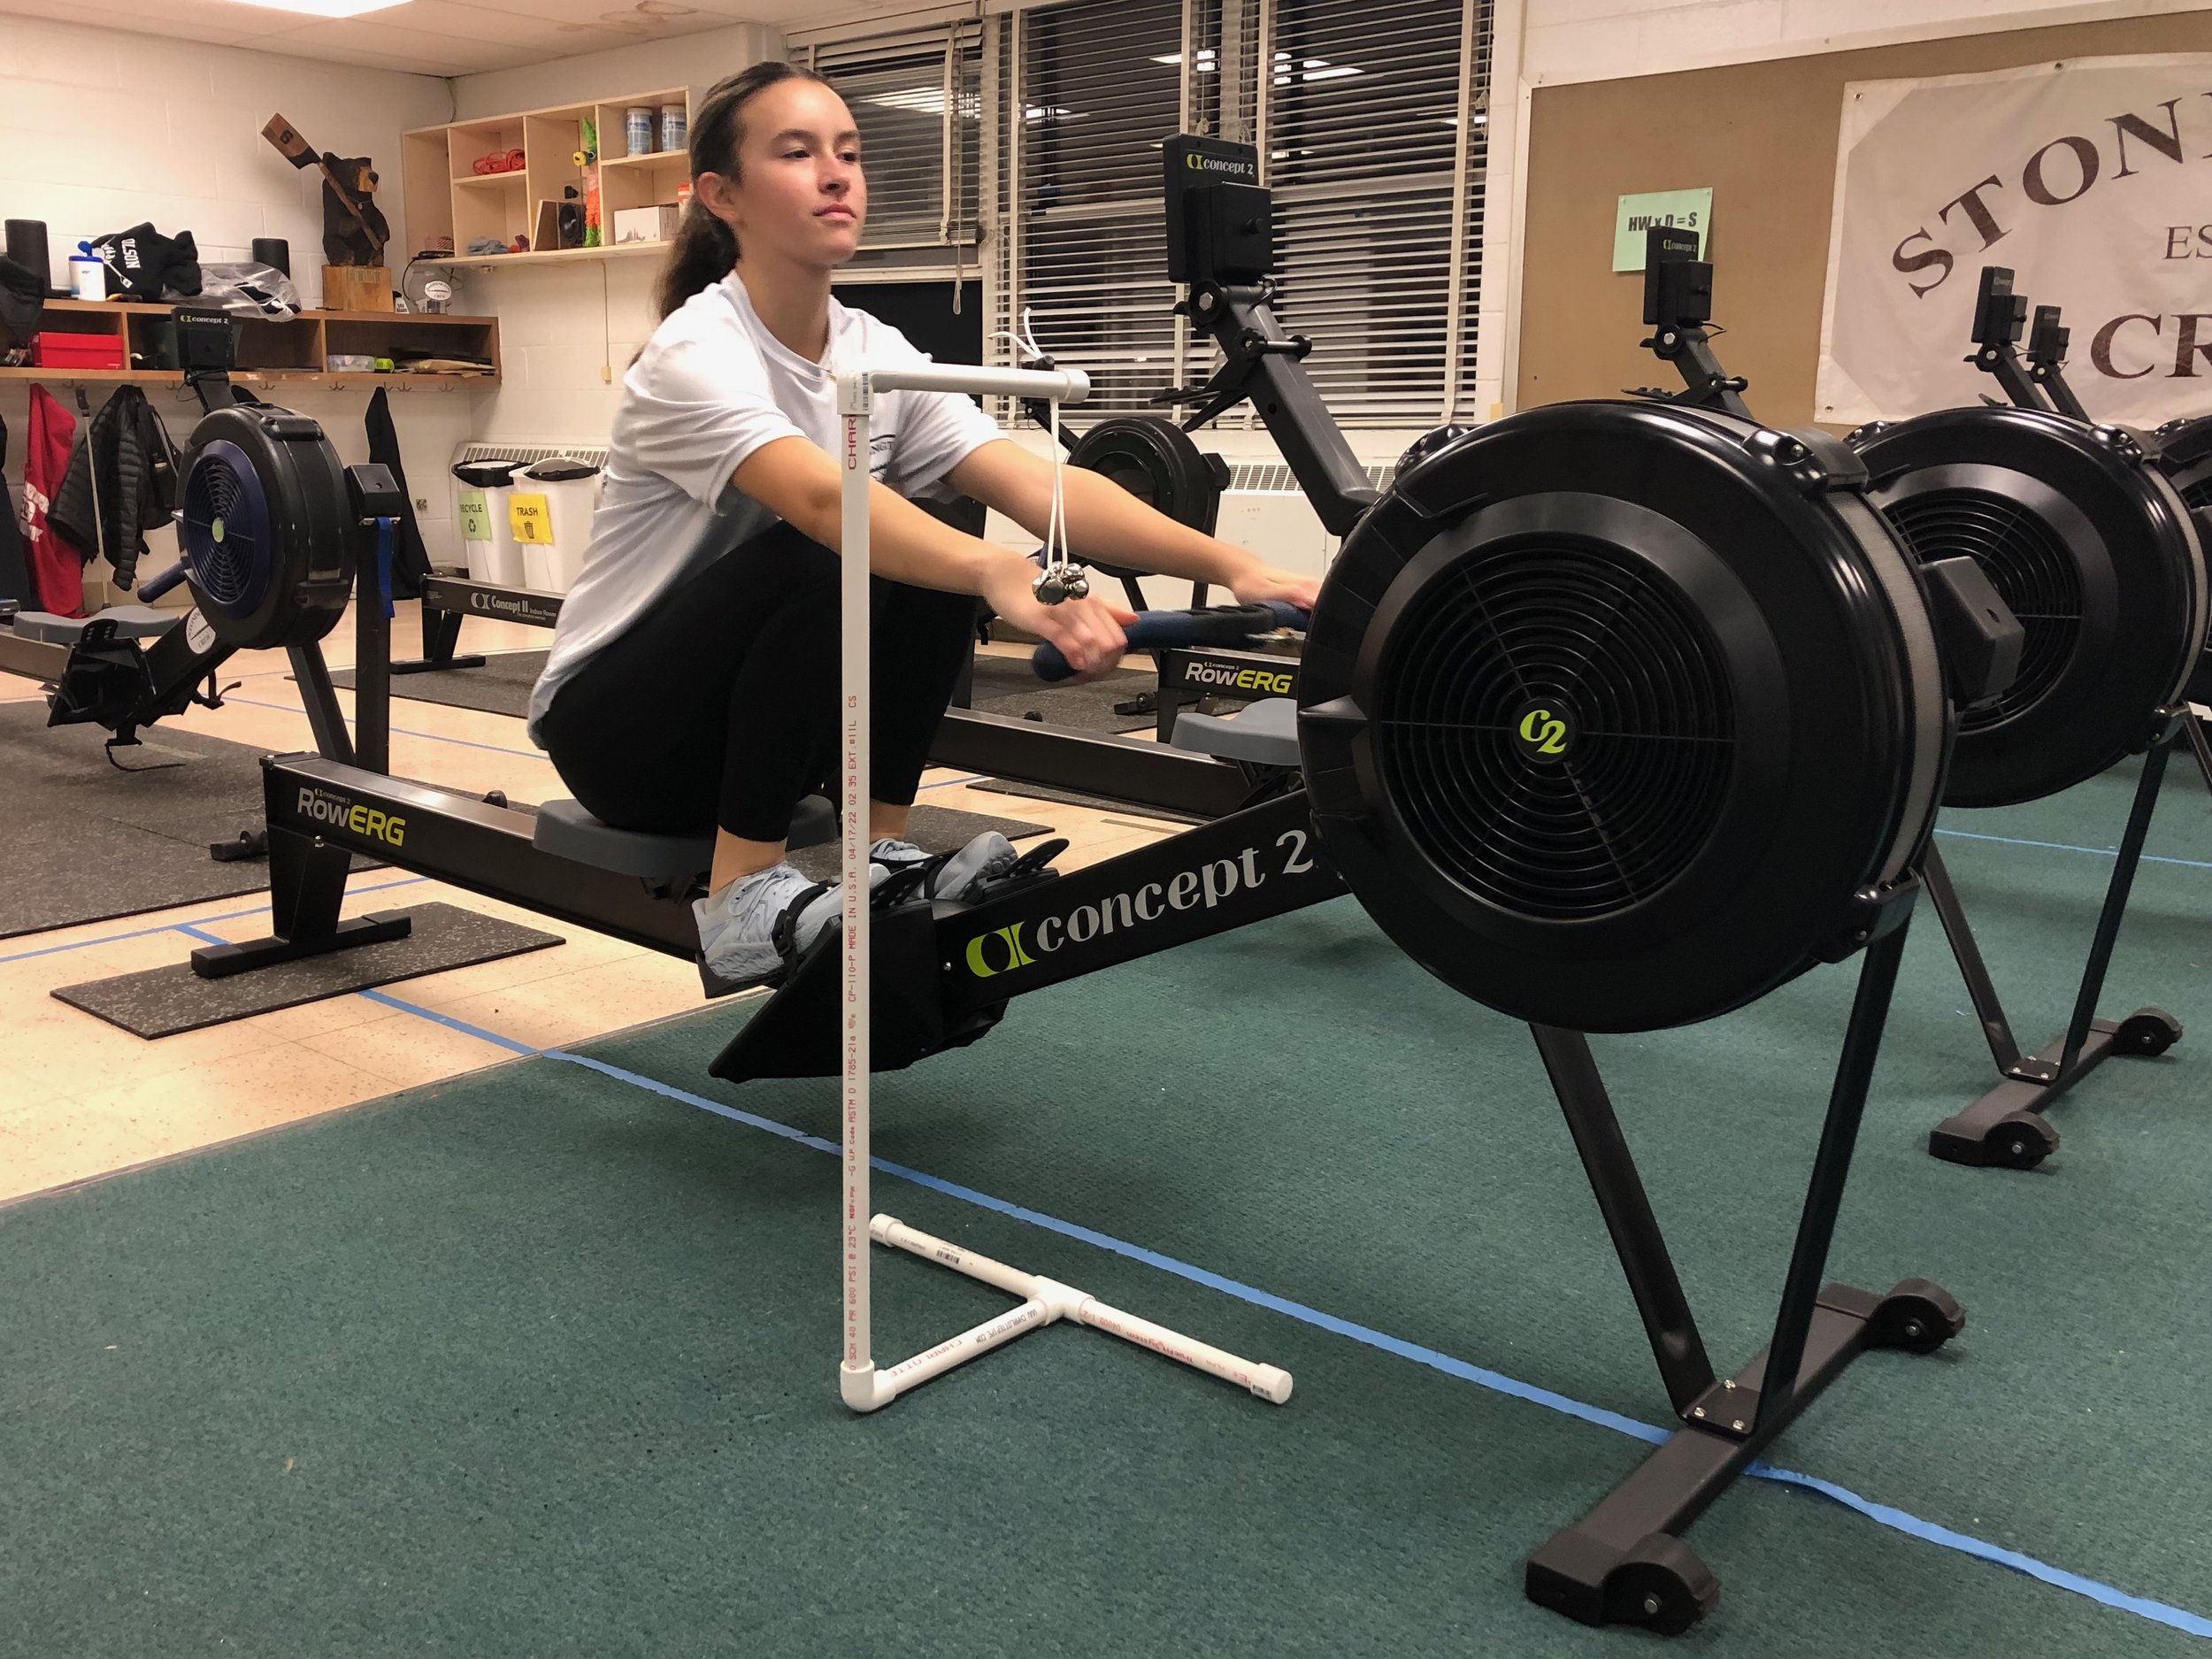
Position the rower at the catch. Shins vertical, good body angle, arms extended, and hands at the desired height. Place the guide so the hanging bells are in front of the rower’s knuckles. The bells can be raised or lowered using the round cord lock.
While rowing, athletes focus on maintaining a level hand height on the recovery—from their sternum directly to the hanging bells. They’re rewarded with a satisfying jingle at the end each stroke!
The tactile feedback is an improvement over visual aids. Rowers’ focus often drifts while using tape on the chain guard or other methods.
Raising hands into the catch
Once rowers master level hand heights, the next step is to practice “placing the blade in the water” while on the erg. From the catch position above, position the bells above the rower’s hand by moving the guide towards the rower and raising the bells using the round cord lock.
At the end of the recovery (with level hand heights), the rower simply raises their hands to ring the bell before they push on the footboards. This can help with catch timing, while on the erg.
If rowers do not have level hand heights, they may “wind-up” to ring the bell by lowering their hands into the catch and raising them on the beginning of the drive. If this is the case, reposition the guide to practice the above level hand-height exercise.
Materials:
The hand-height guide can be made using simple materials from your local hardware store and hobby shop.
1 x Cord lock
1 x 20” nylon cord
5 x Bells
1 x 32” PVC tubing (1/2” dia.)
4 x 9” PVC tubing (1/2” dia.)
2 x PVC 90° elbow fitting (1/2” dia.)
1 x PVC tee (1/2” dia.)
3 x PVC end caps (1/2” dia.)
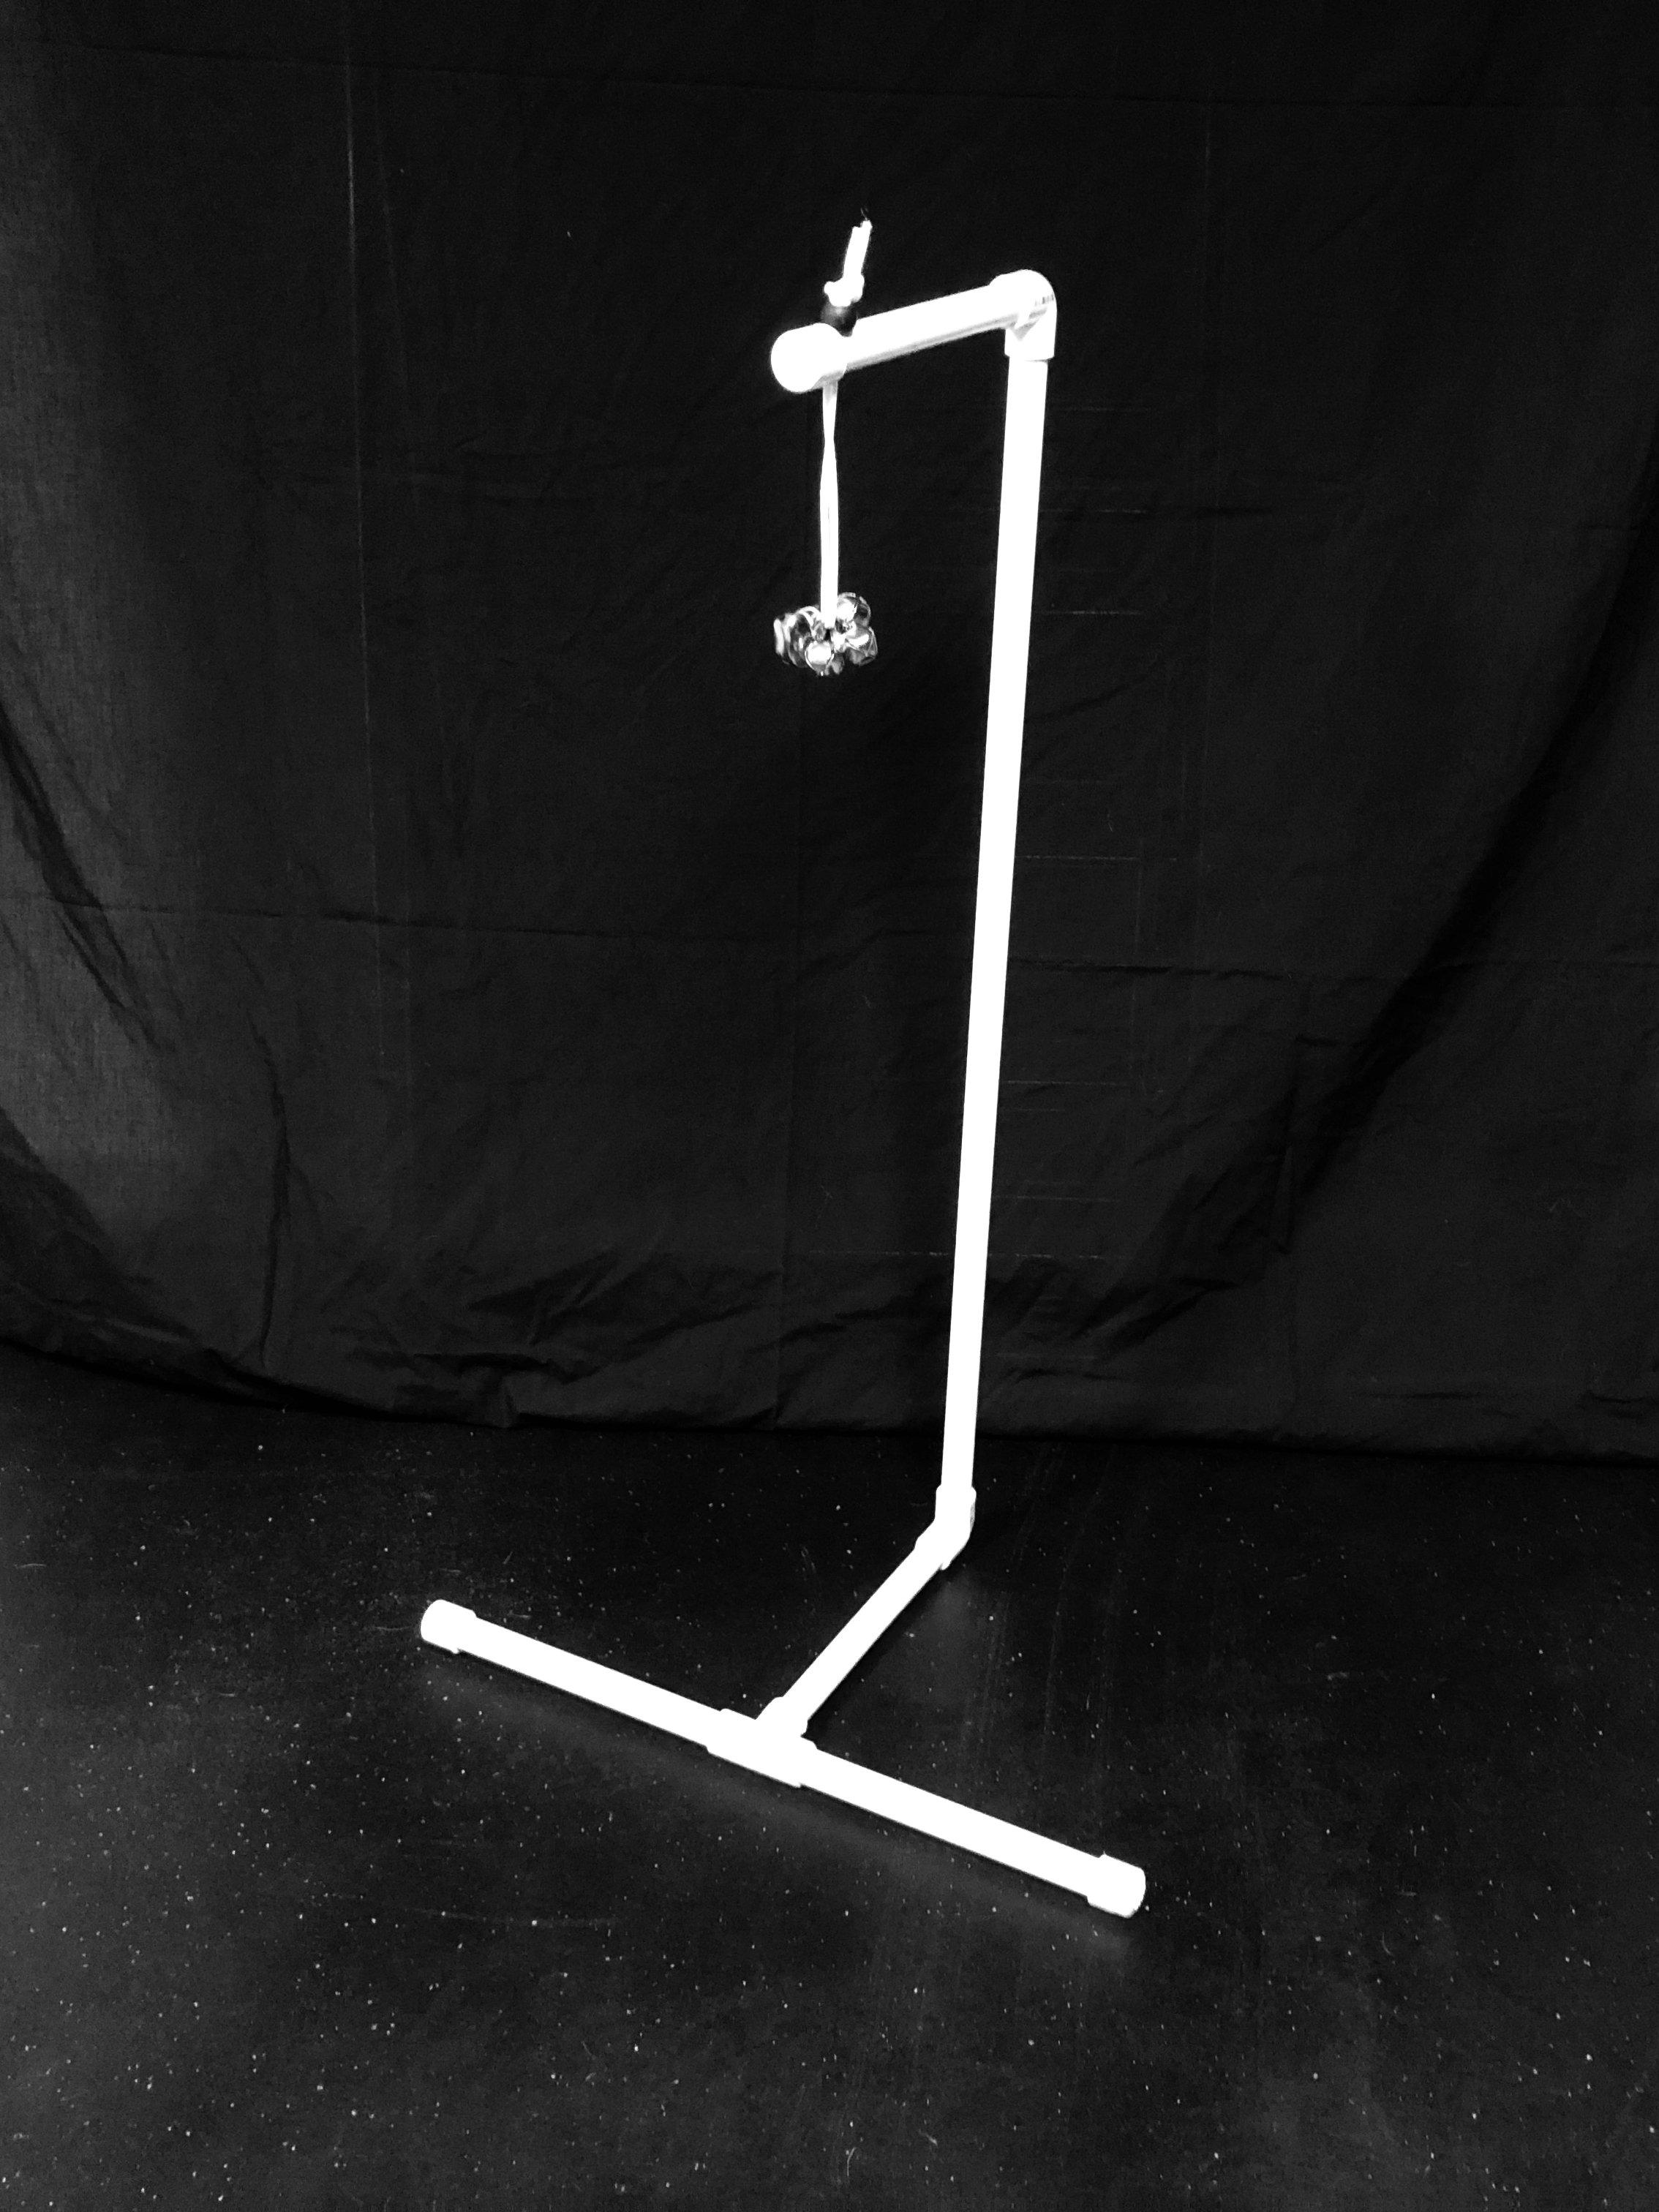
Cut the PVC pipe to size. You will need four 9” length tubes and one 32” length tube. One of the 9” tubes, drill a hole 1” from the end. Insert this tube into an elbow fitting and attach an end cap on the end with the hole.
Attach the 32” tubing to the elbow fitting. At the other end, attach another elbow fitting. Insert one of the 9” tubes. At the end of this tube, attach the tee. In the other two openings, insert 9” tubes with end caps on each end.
Cut the nylon cord to 20" and solder the ends to prevent fraying. Fasten the bells to a ring, wire or zip tie. Feed the cord through this ring, then the hole in the 9” tube. Finally, insert the cord through the cord lock. Tie a knot and, voila! You’re done!


